|
I purchased my AD-1 as a kit off of the Action Drone
Website, meaning I would need to assemble everything.
When I have the time I prefer this as it
will get you very familiar with the workings
of the whole machine. I got the full kit,
motors, 4-in-1 ESC, props etc. Everything
except the NAZA controller, which I already
had.
Everything comes boxed and packaged nicely -
my only comment is that the Tiger carbon
props come overly packed with velvet lined
individual prop bags... which I do not
foresee ever using again and will probably
get thrown away. I'd rather they pack these
in bubble wrap and save everyone the $$.
Hints and tips for building: When installing the motors and o-rings,
be sure to install THREE (3!) o-rings on the
long, rear arms, or you will have to remove
the motors and wires to install the third
o-ring for the landing gear clamp - this was
omitted in the instructions, but luckily I
read ALL the instructions before I started
;-)
NOTES: When installing the split
motor mount blocks on the o-rings, the
spacing is 13mm between the blocks (23mm
bolt to bolt), not 15mm as per the
instructions. ALSO when you put the
washers on the pivoting and sliding bolts
for the arm pivot area be sure to face the
rounded side of the washer toward the carbon
plate... or you will scratch the crap out of
it and it will not fold/un-fold smoothly
(ask me how I know!)
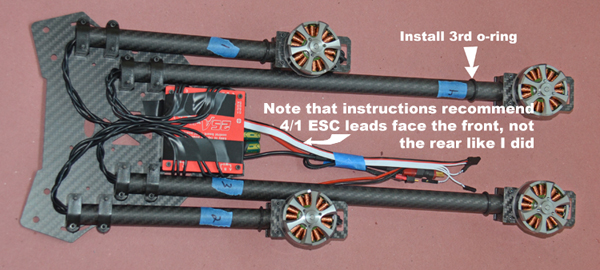
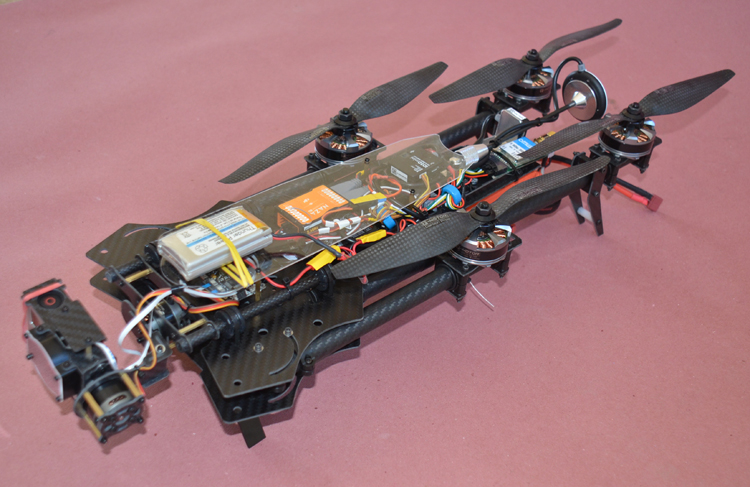
I opted for the 4/1 ESC unit for a
potentially cleaner install. The Tiger
motors have very long leads, and no
soldering needed - just do a general layout
with everything in place, cut to length and
then strip the ends and screw the wire clamp
screws tight. My only issue with this is if
you get a motor going in the wrong direction
it's a bit more fuss than just unplugging
your typical ESC wires. I totally lucked out
and for the first time ever I got all motors
going the right way on the first shot!
One thing about mounting the 4/1 ESC the
way I did is that the battery wires did not
have to be lengthened. I would prefer longer
battery wires so I could mount the ESC's in
the recommended orientation without
soldering on a length of wire, then the
battery plug.
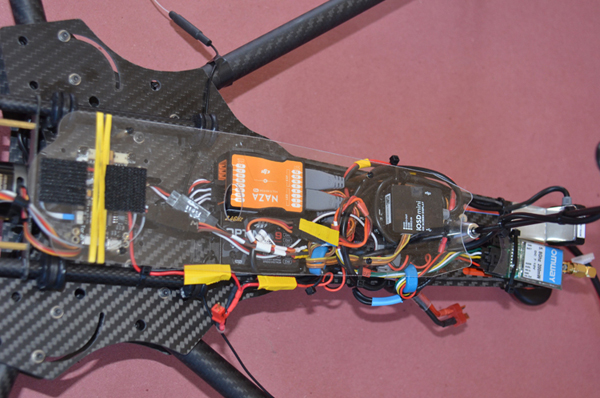
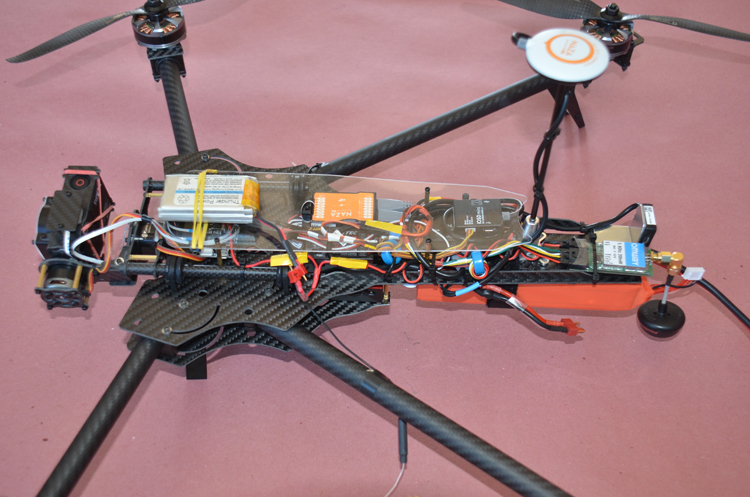
The layout of the control wiring took
me a long time - I had not seen any good
photos of the control wire layout but once
figured out there was plenty of room for:
NAZA w/GPS, NAZA hub, Receiver, DJI Mini
iOSD and OMWAY video Downlink (review on
that soon as well!). With my layout the battery must be
installed on the bottom.
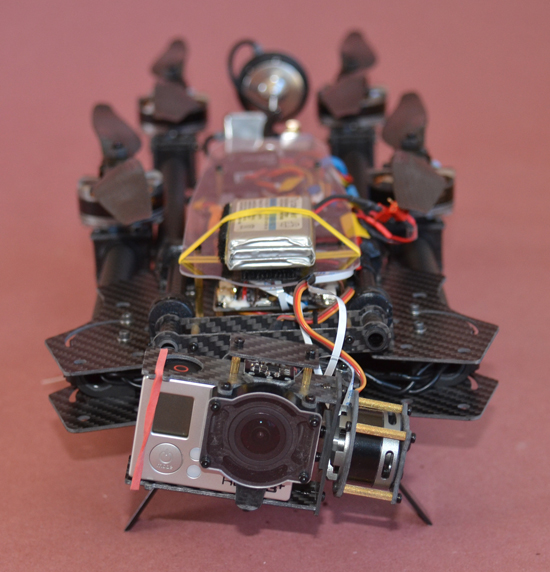
GIMBAL and FLIGHT:
The mounting/vibration dampening system works well -
VIDEO FROM THIS GIMBAL IS JELLO FREE
HERE is
one of my latest video with the 11"
Tiger props.
I started out with 3S-5000MAh batteries as I used
the on my DJI Hexa as well. Yes it will
fly, but was way sluggish so I went with 4S
and all is good. I would not recommend using
3S, just not enough RPM with these torquie
motors. With a 5100MAH 4S battery I'm
getting about 13 "safe" minutes of flight.
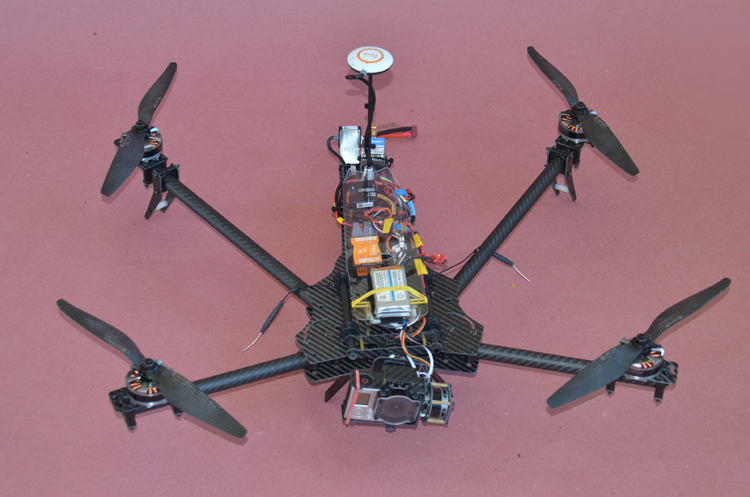
My AUW (all up weight) is 1950 grams,
and that is including both the 4S 5100mAh
main battery and a 3S 850MAh
battery for the gimbal as pictured in the
top photo. This machine flys very well. I am
not a "pro" multicopter flyer, but I will
say this "spider" layout is a lot easier to
keep orientation than a standard Quad or
Hex. UPDATE:
I have since reconfigured my wiring
harness and now I'm using just the main
battery to power everything including the
gimbal - new flying weight is 1890 grams.
NAZA gain settings have been on
discussion on the RCG forums and although
the stock/factory NAZA V2 settings
(recommended by AD) are adequate, I found
bumping the Yaw up a bit got rid of some
"yaw waggle" I was experiencing. SO....
currently my NAZA settings are: Pitch:
125, Roll: 125, Yaw 120,
Altitude: 100. Atti are both set at 125.
PROS:
- great deal for the price - carbon frame
AND gimbal for $460!?
- Jello free video - their isolation system
definitely works.
- Light, strong and stiff
- Excellent quality construction, except
minor items above.
- Folding - I love it, very smooth, yet
holds open well
- "Spider" design, better for orientation
and camera view clearance
CONS:
- Gimbal does not provide power to
camera
UPDATE:
Now comes with a servo type wire lead to
power the GoPro - but be sure you supply
the proper amps at 5v recommended by GoPro.
- Top clear plexiglass cover is too flimsy,
especially if you want to add a second
downlink specific camera,
UPDATE:
now available in fiberglass and carbon fiber.
- Front landing gear prone to twisting - the
separate legs should be made into one piece
or just add the same landing gear to the
front arms that are on the rear arms.
- The isolating grommets for the gimbal are
a pain to install and will tear if you are
not careful
BOTTOM LINE: Highly recommended
- 9 out of 10. The ease of build,
streanght and foldability.... and customer
service all add up to a great machine.
HERE is
some raw video with the off brand 11" props,
the stock 10" props was absolutely jello free.
|